Imagine the thrill of accessing exclusive Destiny 2 rewards simply by watching your favorite Twitch streamers. To make this happen, start by logging into your Bungie account on their website. Next, head over to the settings and find the Linked Accounts section. Select Twitch from the list, authorize Bungie on Twitch, and confirm the link. This seamless process guarantees your accounts are connected, allowing you to claim valuable rewards. But what if you encounter issues along the way? Let’s explore each step in detail to make sure you don’t miss out on any in-game perks.
Key Takeaways
- Log in to your Bungie account and go to the Linked Accounts section in settings.
- Select Twitch from the list of available platforms and authorize Bungie’s access.
- Confirm the successful linking of your Twitch account in Bungie settings.
- Check the Bungie Rewards page to claim your Twitch rewards.
- Ensure your Twitch account appears in the linked accounts list for seamless rewards.
Log Into Your Bungie Account
First, navigate to the Bungie website and log into your account. You’ll need to use the email and password associated with your Bungie profile. Make sure you’re entering the correct credentials to avoid any login issues.
If you’ve forgotten your password, there’s an option to reset it. Simply click on the ‘Forgot Password‘ link, follow the instructions, and a password reset link will be sent to your email.
Account security is important, so make sure your password is strong, combining letters, numbers, and special characters. Avoid using easily guessable information like your name or birthdate. Additionally, consider enabling two-factor authentication (2FA) for extra security. This adds a second layer of protection, requiring you to enter a code sent to your phone or email every time you log in.
If you’re having persistent login issues, check your internet connection and clear your browser’s cache and cookies. Sometimes, outdated browser data can cause problems. Should issues persist, contact Bungie’s support for help. They can assist in troubleshooting and ensuring your account is secure.
Now that you’re logged in, you’re ready for the next steps in linking your Bungie and Twitch accounts.
Access Account Settings
To access your account settings, click on your profile icon in the upper right corner of the Bungie website. This will open a dropdown menu where you need to select ‘Settings.’ Once you’re in the settings section, you’ll find various tabs to manage different aspects of your account.
First, take a moment to review your privacy settings. Here, you can control who can see your online status, game activity, and other personal information. It’s important to adjust these settings to your comfort level, ensuring you maintain control over your data.
Next, focus on account security. Bungie offers several options to enhance the security of your account. Enable two-factor authentication (2FA) to add an extra layer of protection. This means that in addition to your password, you’ll need a code sent to your mobile device to log in. Regularly updating your password and ensuring it’s strong and unique can further protect your account.
Lastly, review any connected services or apps listed under your account settings. This will help you keep track of what’s linked to your Bungie account, ensuring no unauthorized access occurs. Taking these steps will help safeguard your information and keep your gaming experience secure.
Navigate to Linked Accounts
To start linking your Bungie and Twitch accounts, first access your settings on Bungie.net.
Next, locate the section specifically for linked accounts.
Here, you’ll find the option for Twitch integration.
Access Bungie.net Settings
You’ll need to log into your Bungie.net account and head over to the Settings menu to find the Linked Accounts section. Start by accessing the Bungie.net homepage and entering your login credentials.
Once you’re logged in, locate your profile icon in the upper right corner of the screen. Click on it to reveal a dropdown menu, and from there, select ‘Settings.’
In the Settings menu, you’ll find various options related to your account. Look for the ‘Linked Accounts’ tab—this is where you’ll manage connections to other platforms, including Twitch.
Before proceeding, double-check your privacy settings to make sure your account information is protected. Bungie provides several security measures to keep your data safe, like two-factor authentication and activity monitoring.
Locate Twitch Integration Section
Upon entering the Linked Accounts tab, you’ll quickly notice the Twitch Integration section prominently displayed. This area is essential for the integration process, allowing you to connect your Bungie account with Twitch seamlessly.
To begin, click on the Twitch Integration section, which will redirect you to a new page dedicated to linking your accounts.
Here, you’ll find detailed instructions guiding you through each step. Make sure you’re logged into both your Bungie and Twitch accounts before proceeding.
The integration process involves authorizing Bungie to access certain Twitch features, such as your viewing history and activity. This authorization is necessary to guarantee you receive in-game rewards based on your Twitch interactions.
As you navigate through the steps, you might need to input verification codes sent to your email or phone for security purposes.
Once you’ve completed the authorization, the system will confirm that your accounts are successfully linked.
Select Twitch From the List
After accessing the Linked Accounts section, you’ll see a list of available platforms.
Select Twitch from the list, then proceed to the Settings page.
Here, authorize Twitch access to complete the linking process.
Navigate to Settings
First, click on the ‘Settings’ tab located in the top-right corner of your Bungie account dashboard. This will take you to a page where you can manage various aspects of your account, including your privacy settings and security options.
Once you’re in the ‘Settings’ section, you’ll see a list of different categories on the left-hand side. Scroll through this list until you find ‘Accounts & Linking.’ Click on it to open a submenu where you can link your Bungie account with other services, such as Twitch.
Here, you’ll find options for integrating your Bungie account with other platforms, ensuring your gaming experience is seamless and secure.
To make sure you’re on the right track:
- Check your privacy settings: Confirm that your account details are only visible to those you trust.
- Review security options: Activate two-factor authentication (2FA) to add an extra layer of security to your account.
- Locate Twitch integration: Look for the Twitch icon or label to proceed with linking your accounts.
Authorize Twitch Access
Select Twitch from the list of available services to begin the authorization process. Doing this will prompt you to log in to your Twitch account if you’re not already signed in.
After logging in, you’ll see a screen asking for user permissions. These permissions allow Bungie to access certain information from your Twitch account, such as your username and viewing activity, which are necessary to grant you in-game rewards.
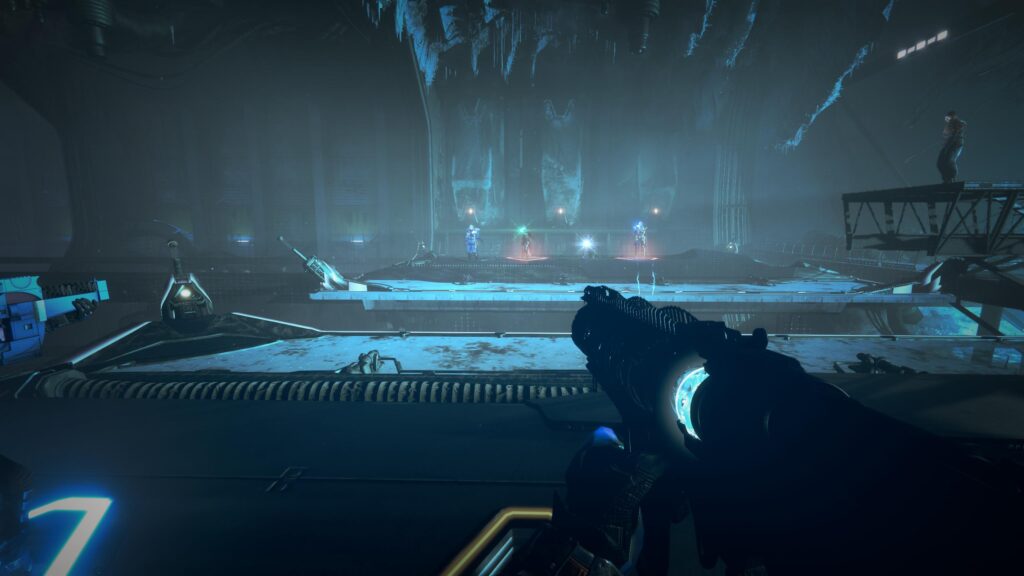
Pay close attention to the permissions request. It’s crucial for data security that you understand what information you’re sharing. Bungie will only access the data needed to link your accounts and provide rewards. You’re not giving access to sensitive information like personal messages or financial details. This process ensures that your data remains secure while enabling the integration.
Once you’ve reviewed and are comfortable with the permissions, click ‘Authorize.’ This step confirms the connection between your Bungie and Twitch accounts.
The authorization process usually takes a few moments, and you’ll be redirected back to the Bungie website once it’s complete. If done correctly, your accounts will now be linked, and you’ll be eligible for any Twitch-related rewards in Destiny 2.
Authorize Bungie on Twitch
To authorize Bungie on Twitch, log in to your Twitch account and navigate to the connections page. Here, you’ll need to find the Bungie.net section. Click the ‘Connect’ button next to it to initiate the authorization process.
By using the OAuth protocol, you’re allowing Bungie to securely access certain parts of your Twitch account. This guarantees that your data is handled safely, and only the necessary information is shared. When prompted, grant the required permissions.
Keep in mind that your privacy settings on Twitch can impact the information shared with Bungie. Make sure your settings align with what you’re comfortable sharing.
Here are some key points to bear in mind:
- Security: OAuth protocol ensures that your login credentials are never shared directly with Bungie.
- Permissions: Carefully review what permissions you’re granting to Bungie, and understand how they’ll be used.
- Privacy: Adjust your Twitch privacy settings if needed, to control what information is accessible.
Once you’ve granted the necessary permissions, the process is almost complete. You’ve now successfully authorized Bungie to interact with your Twitch account, setting the stage for the final step.
Confirm Account Linking
Now that you’ve authorized Bungie on Twitch, it’s time to validate the account linking to make sure you can start earning rewards in Destiny 2.
First, navigate to the Bungie.net website and log in using your credentials. Once logged in, go to the Settings section. Here, you’ll find an option labeled ‘Accounts & Linking.’
Click on this option to proceed to the link confirmation page. This page will show a list of linked accounts, including Twitch, if the authorization was successful. Confirm that your Twitch account appears here.
If it does, the next step is to proceed with account verification.
For account verification, check for any prompts or messages. Bungie might send a confirmation email to the address associated with your Bungie account. Open this email and follow any provided instructions to complete the verification process. This extra step ensures the security of your accounts and confirms that the linking is intentional.
If you don’t see your Twitch account listed or didn’t receive a confirmation email, revisit the authorization steps to troubleshoot any issues.
Successfully completing these steps ensures your accounts are correctly linked, allowing you to earn rewards seamlessly in Destiny 2.
Check for Successful Link
After confirming account linking, double-check that your Twitch account is successfully connected to Bungie.net by looking for it in the ‘Accounts & Linking’ section. To do this, log in to your Bungie.net account and navigate to the appropriate section under your profile settings. Here, you’ll find a list of all the accounts you’ve linked.
During the verification process, make sure that your Twitch account appears in this list with an active link status. This confirms that the connection is established correctly, which is essential for receiving any in-game rewards.
Here are a few things to look for during this check:
- Linked Accounts List: This should include Twitch, with a clear indication of a successful link.
- Active Link Status: Confirm that the status is active, not pending or error-prone.
- Last Linked Date: Verify the date to ensure the link is recent and hasn’t expired.
Claim Your Twitch Rewards
Once your accounts are successfully linked, you can easily claim your Twitch rewards directly through Bungie.net. To do this, navigate to the Bungie Rewards page. This page is designed to streamline the reward mechanisms, making the process straightforward.
You’ll find a section dedicated to Twitch rewards, where you can see all the rewards you’ve earned from watching eligible Twitch streams.
To begin the claim procedures, simply click on the specific reward you want to claim. A prompt will guide you through the necessary steps. Usually, this involves confirming your linked accounts and ensuring your Destiny 2 profile is active. After confirming, the reward should appear in your in-game inventory the next time you log in.
It’s worth noting that some rewards may take a few minutes to a few hours to appear in your inventory. However, if everything is properly linked and you’ve followed the steps correctly, this process should be smooth.
Always make sure to keep an eye on the expiration dates of rewards, as some may only be available for a limited time. By following these steps, you’ll maximize your Destiny 2 experience with Twitch rewards.
Troubleshooting Common Issues
Should you encounter any difficulties while claiming your Twitch rewards, there are several common issues you can troubleshoot. Ensuring a smooth experience often comes down to addressing a few key areas.
First, check your Internet connectivity. A vital connection is important for linking accounts and receiving rewards. If your internet is unstable or slow, try resetting your router or switching to a wired connection.
Next, verify Browser compatibility. Some browsers may have issues with the Bungie or Twitch websites. If you’re experiencing problems, try using a different browser, such as Chrome, Firefox, or Edge. Additionally, make sure your browser is up-to-date to avoid compatibility issues.
Lastly, confirm your accounts are properly linked. Sometimes, the linking process may not complete successfully. To resolve this, unlink and re-link your Bungie and Twitch accounts by following these steps:
- Log out and log back into both Bungie.net and Twitch.
- Navigate to the account settings on both platforms.
- Follow the linking process again, making sure you authorize all necessary permissions.
If these steps don’t resolve your issue, consult the Bungie Help forum or Twitch support for further assistance. By addressing these common problems, you’ll be back to earning rewards in no time.
Frequently Asked Questions
Can I Link Multiple Twitch Accounts to a Single Bungie Account?
You can’t link multiple Twitch accounts to a single Bungie account. Doing so could compromise account security and lead to linking errors. Stick with one Twitch account to guarantee a smooth, secure experience with your Bungie account.
How Often Do Twitch Rewards Become Available in Destiny 2?
You’re curious about the reward frequency for Destiny 2 Twitch rewards. They don’t have a fixed availability schedule, but Bungie often releases them during special events, updates, or promotions. Keep an eye on official announcements.
Are There Any Geographical Restrictions for Linking Bungie and Twitch Accounts?
Regional availability really matters. You’ll find that some geographic limitations might prevent you from linking your Bungie and Twitch accounts. Check the official guidelines to see if your location supports the connection for rewards.
What Happens to My Rewards if I Unlink My Twitch Account From Bungie?
If you unlink your Twitch account from Bungie, you’ll face unlink consequences. Your reward retention might be affected, potentially losing access to any rewards tied to your Twitch account. Re-linking might not restore previously lost rewards.
Do I Need a Twitch Prime Subscription to Receive Destiny 2 Rewards?
You don’t need a Twitch Prime subscription to get Destiny 2 rewards, but Prime benefits include exclusive in-game items. The subscription cost is $12.99 per month, giving you access to these additional rewards.
Conclusion
Linking your Bungie and Twitch accounts might seem complex, but it’s easier than you think. By following the outlined steps, you’ll make sure you don’t miss out on any exclusive rewards.
Imagine accessing a rare item just by watching your favorite streamer! Don’t let technical hurdles stop you; the process is straightforward with clear instructions.
Take the plunge, link your accounts today, and enhance your Destiny 2 experience with Twitch rewards.
🌟 Dive into a world of great content. Visit homepage now!